Filters
Use Filters to segment Subscribers based on set Rules placed on Subscriber List Fields.
This allows Broadcasts to be delivered to a more tailored and specific set of Recipients based on Subscriber information.
View a Filter
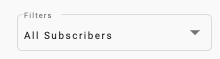
By default, the Subscriber Table will be set to view ‘All Subscribers’ without an added Filter.
To view Subscribers that belong to an existing Filter in the Table, click on the Filters dropdown and select the Filter you wish to view.
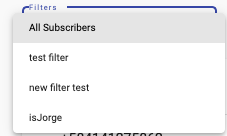
Once a Filter has been selected, the Subscriber List will display those Subscribers that belong to that FIlter.
Create a new Filter
To start the creation of a new Filter, click on the Create Filter button

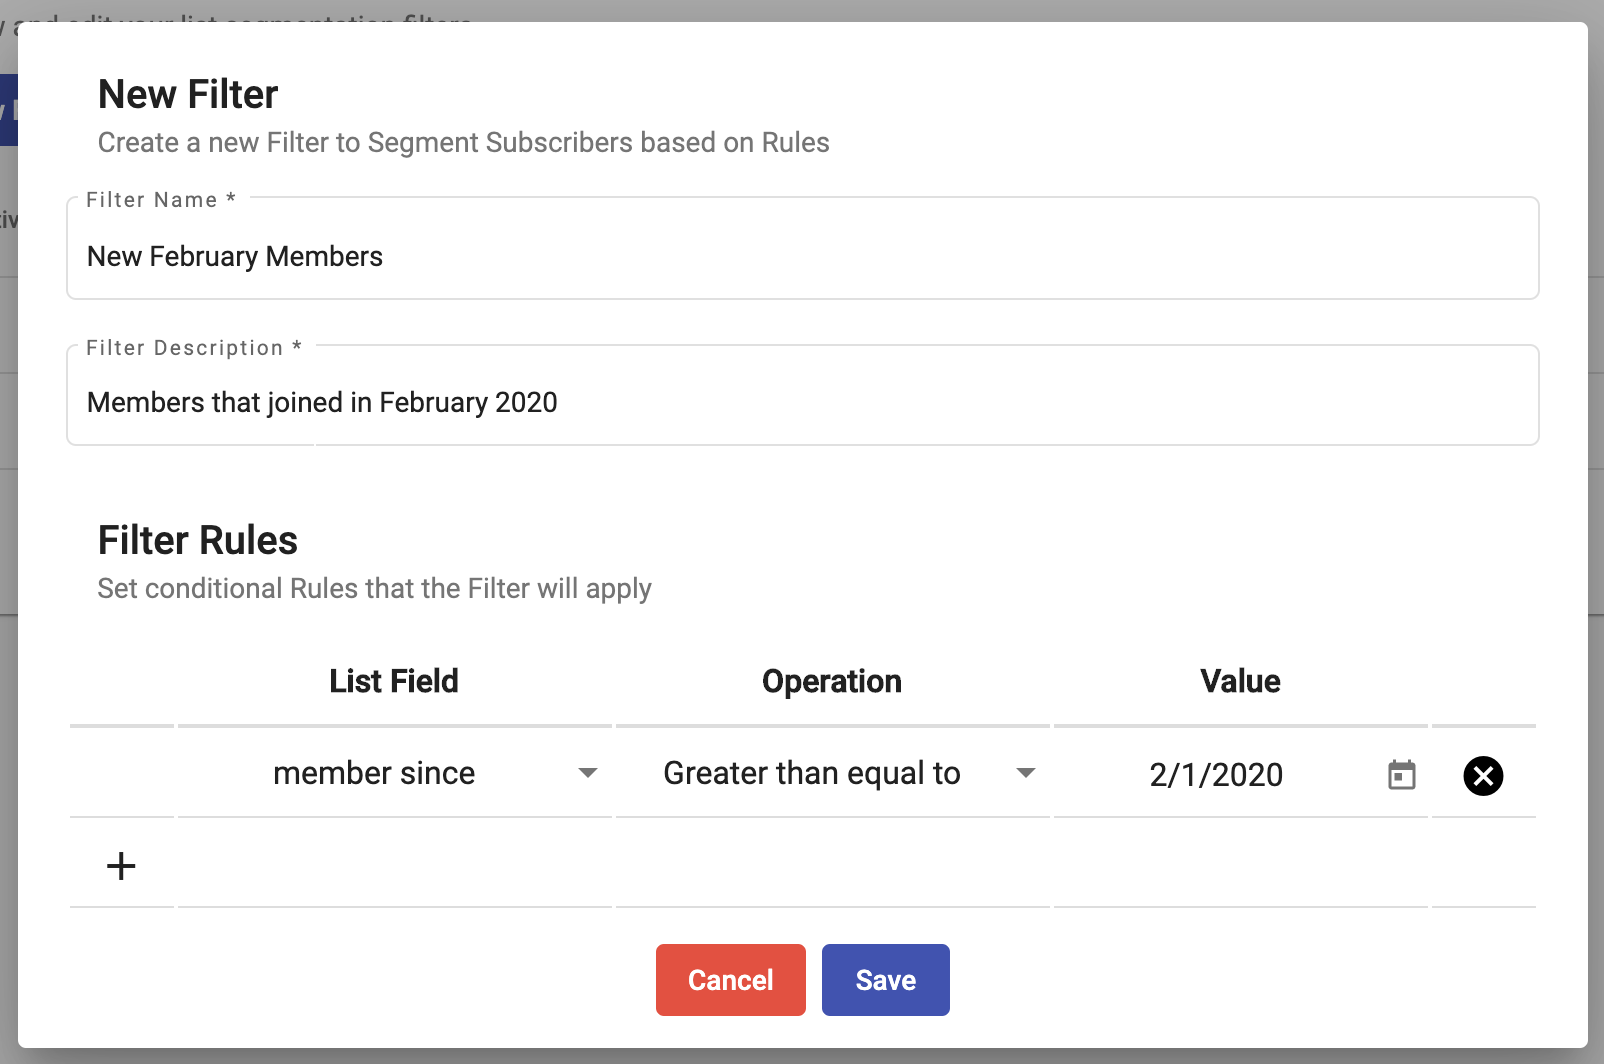
A Dialog will open to start the Filter creation process.
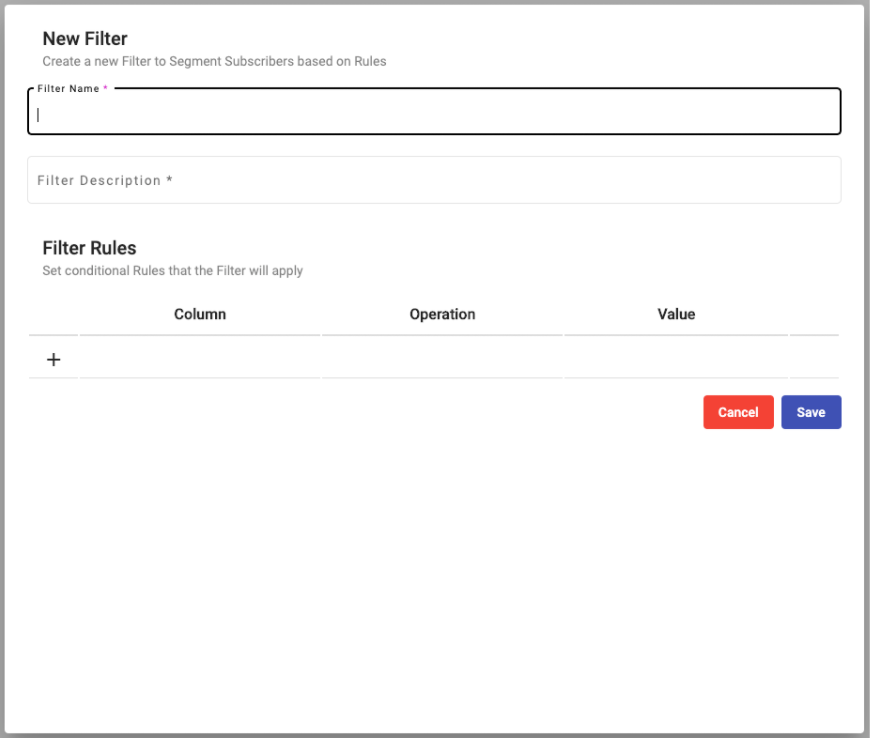 |
Enter the Filter’s Name and Description.
Add Filter Rules by clicking on the (+) button and dropdown will appear for the Column and Operation columns.
Column:Select the Subscriber List Field to apply the Filter Rule on

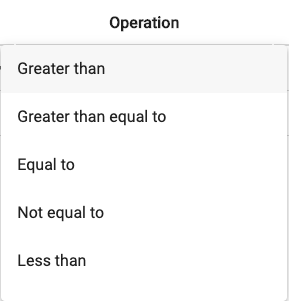
Operation:Conditional Rule to be applied on the selected Column List Field
Value:Enter the value that will determine what the Filter Conditional Rule applies to.
Once you have set the Filter Rules, click on the Save button to finish creating the new Filter.
Note
You may apply more than one Rule per Filter.
If the user does not enter the name, description or filter rule (List Field, Operation, Value), a message is displayed mentioning the filter field that the user needs to enter. By not entering any field, it is not allowed to create the New Filter.
For example, if the user does not enter the description of the new filter, a warning message will be displayed at the bottom of the screen.
 |
In case the user does not enter any Filter Rule (List Field, Operation, Value), a warning message will also be displayed at the bottom of the screen.
 |
Click OK to minimize the warning message. The message will also disappear on its own after a few seconds.
Manage Filters
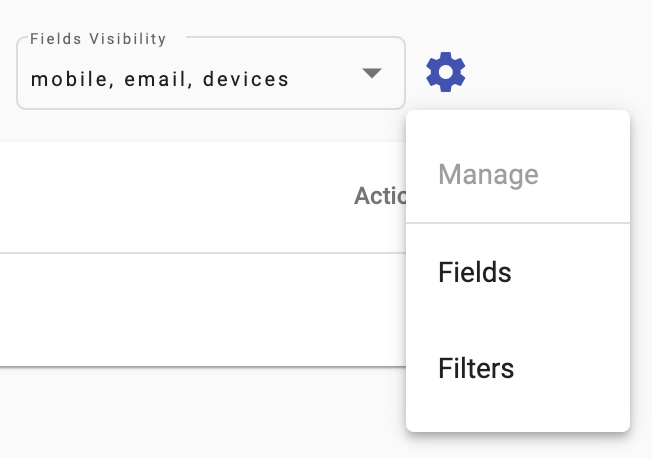
From the main Subscriber section, manage the created Filters by clicking on the settings icon next to the Fields Visibility dropdown
A dropdown will appear, click on Filters from the presented options
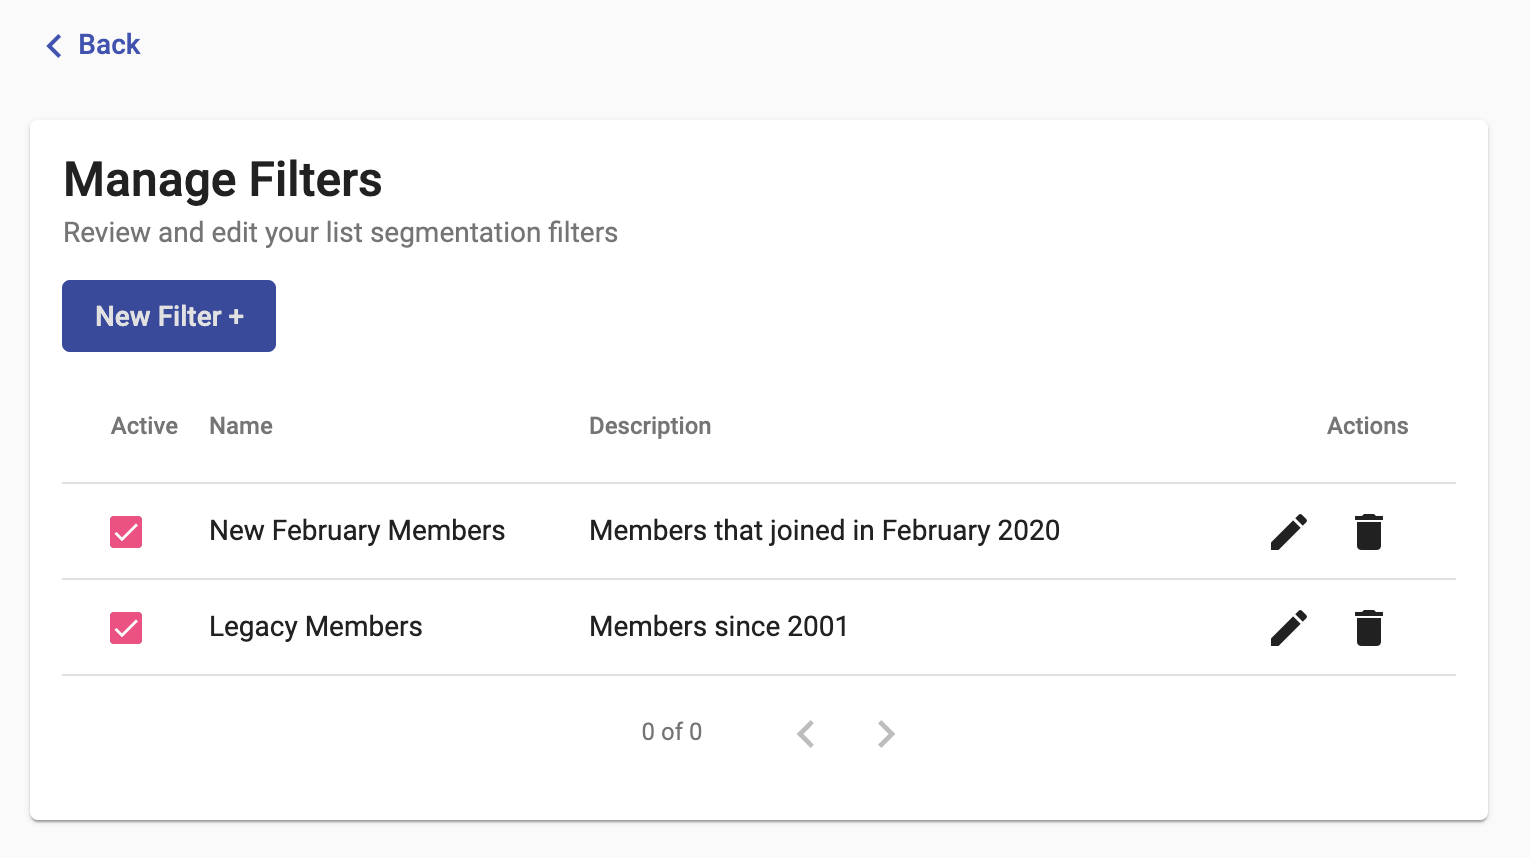
A Field Management screen will be displayed
Edit a Filter
From the Filter management screen, edit an existing Filter by clicking on the Edit icon ( ) located in the displayed Filter’s row.
The Filter’s configuration will be displayed in a Dialog where you can make the desired changes.
Once the desired changes have been made, click on the Save icon.
Delete a Filter
From the Filter management screen, delete an existing Filter by clicking on the delete icon ( ) located in the Actions column of the filter row.
A Dialog will be displayed to confirm the Deletion of the Filter.
Click on the Delete button to remove the filter.
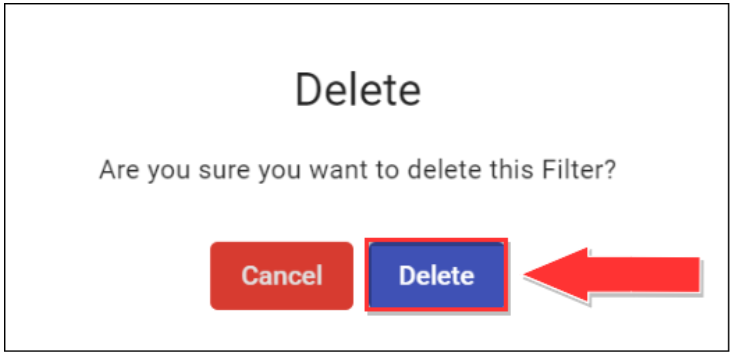 |
Once the Delete button is clicked, the filter is removed from the Manage Filters section.
Filter Example
Create Filter to determine Subscribers that became ‘members’ after February 1, 2020.
This will be used in a Broadcast to deliver a special ‘Welcome’ SMS message to new Members.
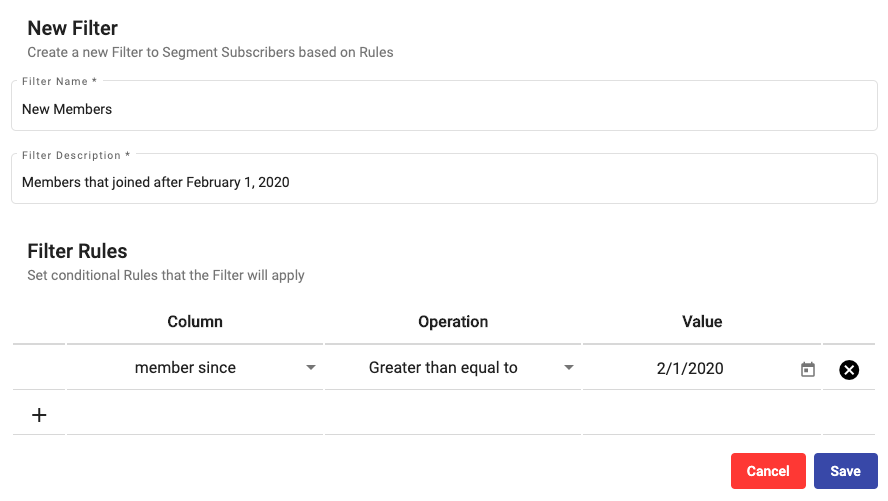
In the Filter Rules, select ‘member since’ from the Column dropdown to determine the Subscriber Field that contains the date where the Subscriber became a ‘member’.
For ‘Operation’, select ‘greater than equal to’ to obtain those that became members on or after February 1, 2020.
In ‘Value’ select February 1, 2020 from the Picker.